This tutorial will assume that you have already installed Eclipse and its up and running. That said and done, lets get started shall we!
Step 1
We have to download twitter boot strap from BootStrap download . Boot strap is a front-end framework for faster and easier web development. It comprises of HTML, CSS and JS. It is made for folks of all skill levels, devices of all shapes and project of all sizes.
Step 2
Once you have downloaded the boot strap, fire up your eclipse and create a dynamic web project. This is how to do it, Assuming that you eclipse is in Java EE perspective, click on File – new – Dynamic web project. In the project name enter Boot Strap Form Example and click finish. Your project structure should look like this: 
Step 3
So far so good, now it is time to import our downloaded boostrap. In project structure right click on Web Content folder – click on import – select Archive file – click next – add select our twitter boot strap – click finish. Now your project structure should look like this:
Step 4
It is time to do some coding. Here is where the fun begins: Right click on web content folder – select New – and Select HTML file. Name the file index.html, usually index.html act as a landing page unless otherwise specified and click finish.
Step 5
Replace the content of the index.html with the following code


Step 6
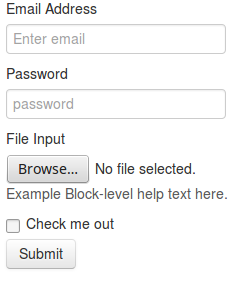
It is time to run our program, Right click – on index.html – select Run as – Run on server.
Here is our form
If need the source code of this project visit my git hub profile Henry Mbugua Kiarie and download zipped folder
